快速入门

这是个快速入门示例,通过这个示例您可以快速了解GenUI的开发过程。

环境说明

名称版本
Mac-
Ract0.1.0
TIP

更多Ract详细命令请参照: Ract

安装并配置Ract

Ract是您开启GenUI之路的第一步,请选择最新的版本进行下载

Releases: https://github.com/Privoce/ract/releases

配置

WARNING

您的计算机可能会提示安全问题,请选择允许

当前Windows系统的打包问题尚未解决

您可以通过以下方式将 ract 配置为全局命令:

Macos | Linux
Windows
1# copy download ract to /usr/local/bin
2sudo cp /path/to/download/ract /usr/local/bin/ract/ract
3
4# add permission
5sudo chmod 755 /usr/local/bin/ract
6sudo chmod 755 /usr/local/bin/ract/ract
7
8# confirm permission
9sudo chown -R $(whoami) /usr/local/bin/ract
10
11# echo to .zshrc
12echo 'export PATH="/usr/local/bin/ract:$PATH"' >> ~/.zshrc
13
14source ~/.zshrc
15# get version
16ract --version

使用说明

  • 输入|选择 结束需要使用回车表示完成当前操作
  • 当出现选项卡时使用空格表示增加或切换选项
  • 您需要使用 键来切换选项卡
  • 您需要使用 键来调整输入时光标的位置
  • 您需要输入Yes/yNo/n来表示是或否,当出现询问项时
  • 当出现错误或需要撤销重置或停止时请使用ctrl + c

使用Ract创建项目

运行ract create命令,Ract会自动帮您检测环境,当所有工具链完整时,Ract会帮助您构建一个项目

Ract会提示您相关的工具链的缺失,如果您的工具链不完整,可以直接使用ract install命令进行响应的安装

TIP

如果您是个新手,那么可能需要安装:

  • rustc,git,makepad
  • git
  • makepad
    • gen_components
    • wasm_build
    • default

你所要做的只是选择安装项即可

install的交互式对话框示例

1🥳 Welcome to use ract Install!
2
3🔸 Select the tools to install:
4  - rustc
5  - cargo
6  - git
7  - makepad tools (default or custom options)
8? What tools you want to (re)install?
9> [ ] rustc|cargo
10  [ ] git
11  [x] makepad
12? What you need to (re)install?  
13  [x] gen_components
14  [ ] android_build
15  [ ] ios_build
16> [x] wasm_build
17  [ ] makepad_studio
18  [x] default

create的交互式对话框示例

1❤️ WELOCME TO GENUI, ract is a build tool for you!
2🔸 Current states:
3        🔻 Basic Tools
4                🔹 rustc: ✅ 
5                🔹 cargo: ✅ 
6                🔹 git: ✅ 
7        🔻 Makepad ToolChains:
8                🔹 makepad: ✅ 
9                🔹 gen-ui: ✅ 
10> Which framework template do you want to create? gen_ui
11> Input the name of the workspace: quickstart
12============ Project1 ======================
13> Which underlayer you want to select? Makepad
14> Project name: start
15> Authors name: 
16> Project description: This project is created by ract. Repo: https://github.com/Privoce/GenUI
17> Choose LICENSE: MIT
18> Version: 0.1.0
19> Keywords: front_end, ui
20> Do you confirm the project information? Yes
21> Do you want to add another project? No
22> Init as a git repository? No
23> Confirm All? Yes
24🛠️ ract is creating a new GenUI workspace `quickstart` in: /Users/shengyifei/projects/gen_ui/made_with_GenUI
25🚀 Create a new workspace project successfully!
26🚀 Create a new cargo project successfully!
27🎉 Your project has been created successfully!

启动项目

在GenUI中,你需要使用ract run来启动项目

TIP

您无需cd到源项目代码目录,只需要cd到GenUI项目根目录即可

GenUI项目是个典型的Rust Workspace项目,项目根目录就是Workspace目录

例如,您在/Users/John/projects/gen_ui_project处使用了ract create构建一个名叫quickstart的workspace。 你只需要cd/Users/John/projects/gen_ui_project/quickstart即可。然后直接运行ract run

启动结果

启动后,您会在终端中获得如下输入:

1🥳 Welcome to use ract project runner!
2
3🔸 Now you can run makepad and gen_ui (Comming Soon) project
4❗️ Please make sure your project root has a `.ract` file to point the project kind
5🔸 If you do not know `.ract` file, please run `ract book` to search (Comming Soon)
6
7
8                                                      
9     _/_/_/  _/_/_/_/  _/      _/  _/    _/  _/_/_/   
10  _/        _/        _/_/    _/  _/    _/    _/      
11 _/  _/_/  _/_/_/    _/  _/  _/  _/    _/    _/       
12_/    _/  _/        _/    _/_/  _/    _/    _/        
13 _/_/_/  _/_/_/_/  _/      _/    _/_/    _/_/_/       
14                                                      
15
16GenUI-Compiler :: [2025-01-23 12:00:55] :: INFO >>> 🔧 Log Service is starting... Log entries will be available after the `app event::Change` occurs!
17    Creating binary (application) `src_gen_0` package
18note: see more `Cargo.toml` keys and their definitions at https://doc.rust-lang.org/cargo/reference/manifest.html
19GenUI-Compiler :: [2025-01-23 12:00:55] :: INFO >>> 🔧 Watcher Service started successfully! Ract is watching: `/Users/John/projects/gen_ui_project/quickstart/start`

此时Ract正在帮你监视并实时编译你的GenUI项目

启动UI

启动后,您会在workspace中获得一个名为src_gen_0的编译包,您需要新增一个终端并cd到这个目录并使用cargo run启动项目即可

1cd src_gen_0
2
3cargo run

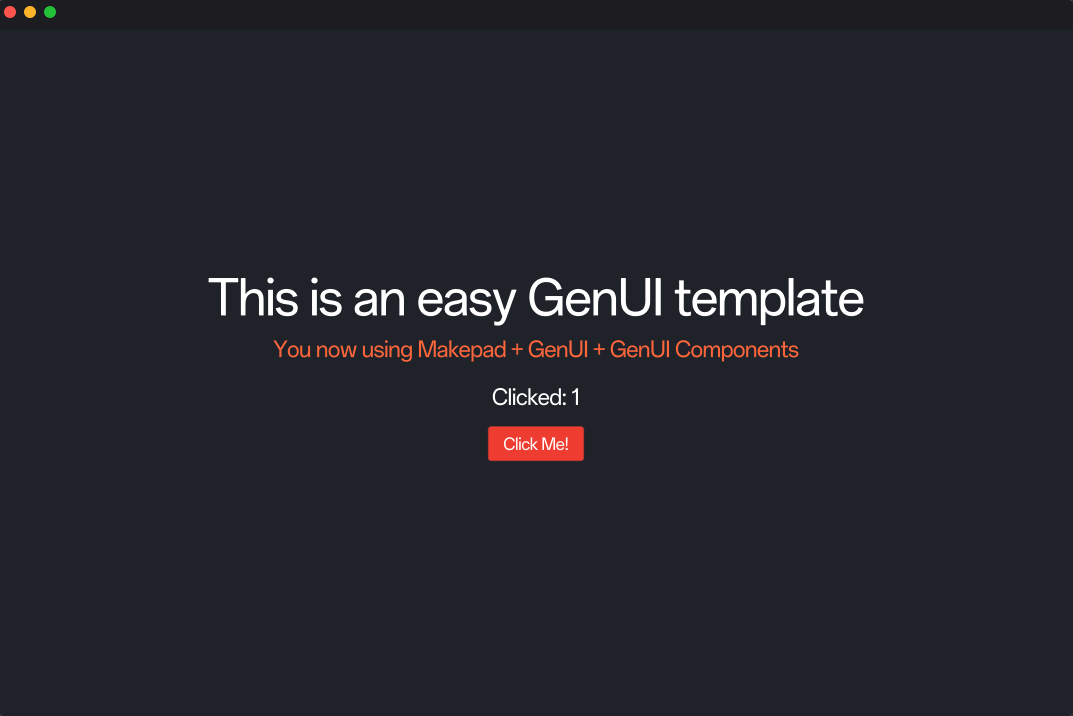
最终您将获取一个视图:

新增页面组件

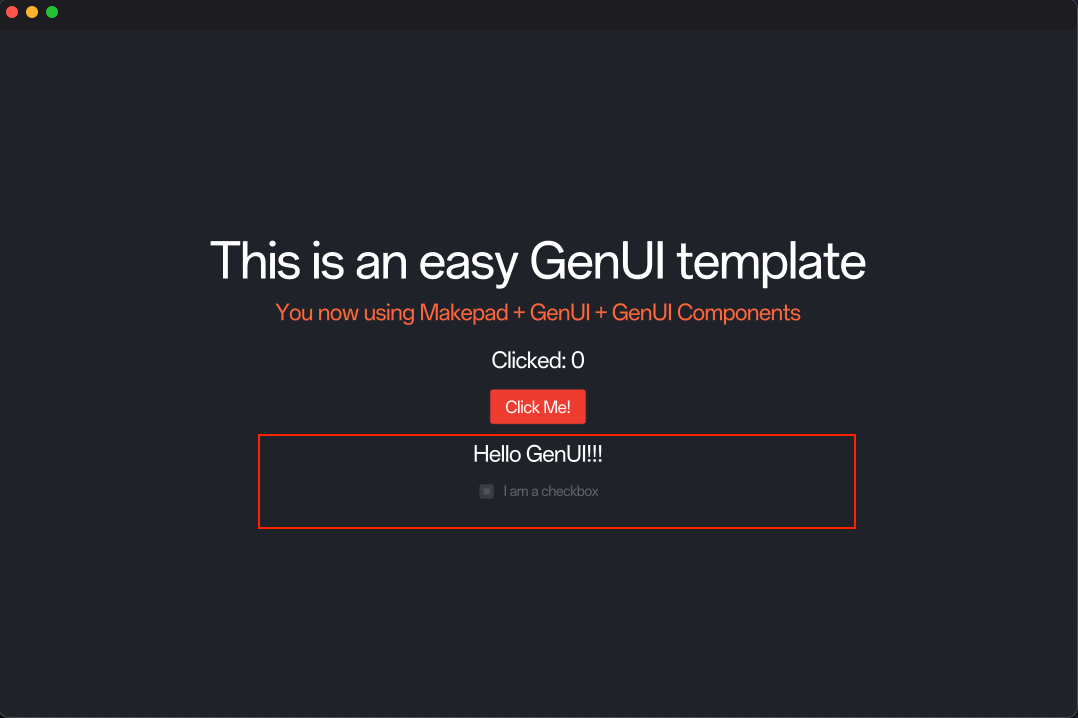
接下来,我们为home页面增加一个文字组件和多选框组件

打开start目录中的views目录下的home.gen文件

<template>添加如下代码:

home.gen
1<label text="'Hello GenUI!!!'" font_size="16.0"></label>
2<checkbox text="'I am a checkbox'"></checkbox>

完整<template>如下代码所示:

home.gen
1<template>
2    <component name="Home" class="home_view">
3        <Hello id="header"></Hello>
4        <button id="my_btn" theme="Error" @clicked="click_btn()">
5            <label as_prop="slot" text="'Click Me!'" font_size="12.0"></label>
6        </button>
7        <label text="'Hello GenUI!!!'" font_size="16.0"></label>
8        <checkbox text="'I am a checkbox'"></checkbox>
9    </component>
10</template>

Ract进行增量编译后您会获得如下提示:

1GenUI-Compiler :: [2025-01-23 12:10:00] :: INFO >>> File `/Users/John/projects/gen_ui_project/quickstart/start/views/home.gen` compiled successfully.

并且视图会进行自动更新: